UniWeb spam filter control panel can be accessed by visiting https://spamfilter.uniweb.eu/. There are two access levels. Individual users can log in using their mailbox credentials (email address and password) and postmasters can manage domain-wide settings using credentials for UniWeb Mail Configuration Panel. It is also possible for postmasters to log into Spamfilter Control panel from the Mail configuration panel:

After you are successfully logged in, you will notice the Control Panel Dashboard and several tables with buttons for all available features depending on your access level.
Email User Level
Log Search
The log search allows you to view all accepted, and rejected messages.

By using the "Classification", and "Status" options, you are able to fine grain your search to match your specific criteria.
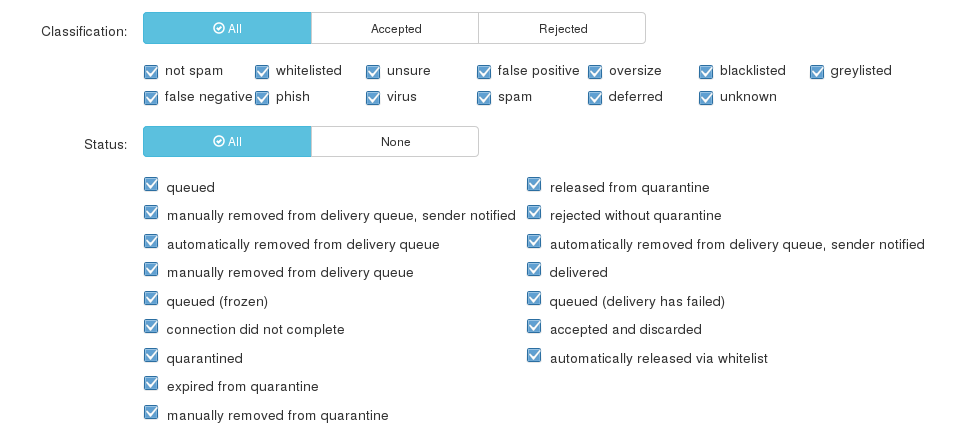
While the "Customize" option allows you to define what columns you prefer to be shown.
On each message, there are various drop-down actions either per message or in bulk

Email Scout Reports
The ESR reports allow you to create one time or timed reports on results from your log searches.
To use this you need to first use the log search to get the data that you need, then click on the "Email me this report" button

Extended details on how you can create reports can be found here.
Delivery Queue
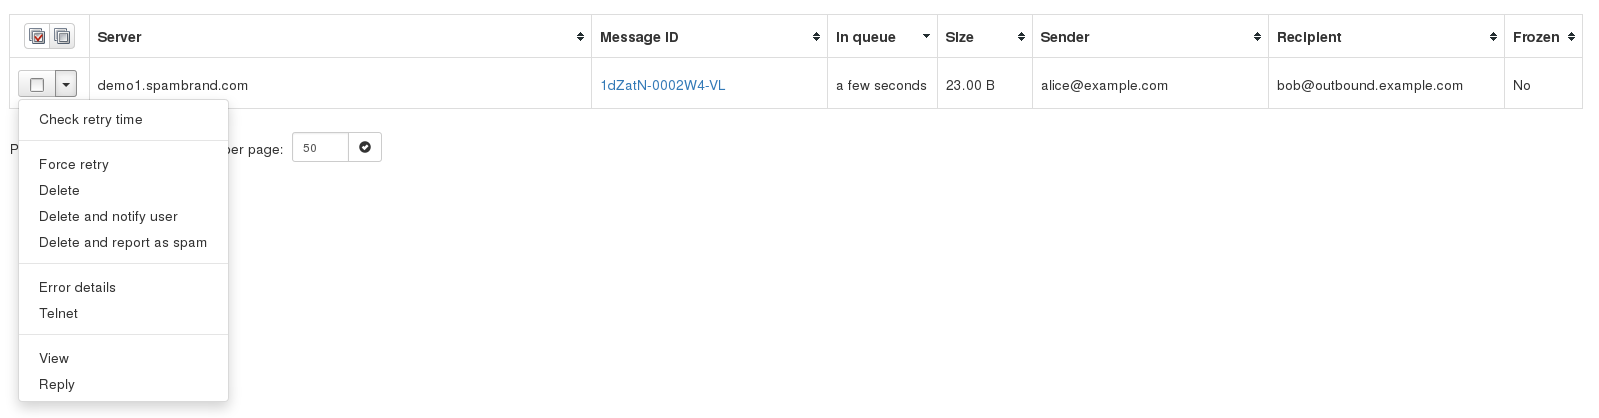
This page shows emails that cannot be temporarily delivered to the destination mail server. Messages that end up here will only be due to temporary issues (4XX error) with the destination mail servers.
On this page you have several options using the drop-down menu net to the message:
- Retry to delivery all messages (Apply to Selected - Force Retry option)
- View Message (View option)
- Delete Message (Delete option)
- Delete and Report as Spam (Delete and report as spam option)
- Force retry individual message (Force Retry option)
- Check the Queue Reason (Error Details option)
- Check the Retry Time (check option under Retry time)
- Search for messages (Delivery Queue page)
- Reply (reply to the queued message directly from the interface
You can view the content/raw headers of a queued message by pressing the drop-down black arrow on the selected message and View.
We have also reintroduced the option 'Error details' to check the reason why messages are stored in Delivery Queue.
It is possible to execute “bulk removal” on selected messages by putting a tick in the checkbox of the selected messages and choose “Remove messages” from the actions at the bottom of the screen.
Choosing the “Delete & Report as Spam” option will report the selected message(s) to the training server and delete the message from the queue.
If you choose "Reply", this allows you to compose and reply to a message to a sender when the message is queued.
It's also possible to search the delivery queue using the search option in the interface:
When a message cannot be delivered to its recipients nor returned to its sender, the message is marked as “frozen”, and only occasional delivery attempts are made before eventually giving up on the message. You can now search the Delivery Queue for all the queued messages (including frozen messages), or only ones that are “frozen”, or only normal messages excluding frozen messages. Further details on the queuing system can be found here
Spam Quarantine
The Spam quarantine interface displays all the incoming quarantined messages.
By default, logs are stored in the Spam Quarantine for 14 days.
From the quarantine overview, you are able to view the messages and sort or search on specific criteria. The “From:” address is used here to resemble the results an email client would show.
Directly from the overview you have the ability to use the following actions:
- Release - This will release the specific message from the quarantine and it will only deliver it to the intended recipient.
- Release and Train - This will deliver the message to the recipient and train the message as ham into our filtering system. This option is recommended when releasing the messages from Spam Quarantine so that the filters can be correctly adjusted.
- Release and Whitelist - This will deliver the message to the indented recipient and automatically add the sender’s email address to ‘Sender Whitelist’.
- Remove - This will delete the message from Spam Quarantine.
- Remove and Blacklist - This will delete the email and automatically add the sender’s email address to ‘Sender Blacklist’.
Please note that releasing messages has effect on your filtering, so releasing spam/virus/phishing emails may have a negative impact on your filtering quality.

To view a message, simply click on the "Subject" from the overview
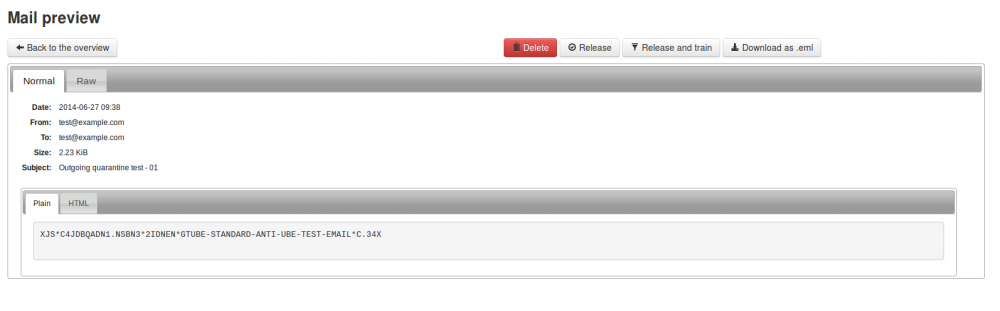
To view the headers and full raw content of one quarantined messages:
- Click on the subject of the relevant message
- Click the ‘Raw’ tab
- Click ‘Load raw body’ at the bottom of the headers
To view the reason for the blocked message, you will need to look for the “Evidence:” line of the raw header and then compare it against our classifications “page”.
Train Spam
With this option, you can drag and drop or upload spam messages that passed the filter for immediate training to the systems.
The emails should be in .eml, .txt or .msg format and it must contain the full headers, including the filters' additional headers.
Train Not Spam
With this option, you can drag and drop or upload messages you wish to classify as not spam (ham) for training. The emails must be in .eml / .txt / .msg format and it must contain the full headers, including the filters' additional headers.
Archive search
Here you can search for messages that match the specified criteria that have been archived. You can set the text to be found in the field ‘query’. Also, you can choose the mode.
It may be ‘all’, ‘any’, ‘Boolean’ or ‘phrase’. The Boolean mode allows the ‘&’ (and), ‘|’ (or), ‘-’ ‘!’ (not) operators and grouping ‘(’ and ‘)’ to be used in the query.
All archived emails are indexed including readable attachments. They can be searched using any search string.
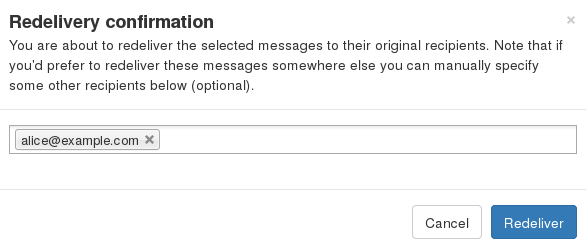
You are also able to view, download or re-deliver the messages to the same or different recipients.
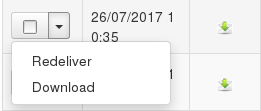
When re-delivering please make sure you press enter for each recipient.
This can also be done via the log search page, by selecting the messages and using the drop-down action "Re-deliver"
Archive Export
Here you can export archived messages for a specified date range to a destination email of your choosing.
All the archived emails from that period will be downloaded as individual files in a zip archive.
This can also be done via the log search page, by selecting the messages and using the bulk action "Download".
Periodic user report (email user)
The periodic user page allows enabling/disabling/removing your current report settings.

Sender Whitelist (email user)
The email user level sender whitelist allows whitelisting specific senders or domains for the specific recipient.
Wildcards are available here.
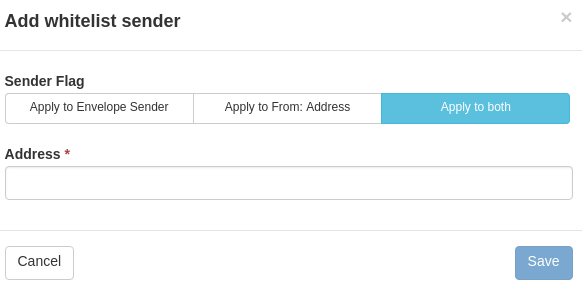
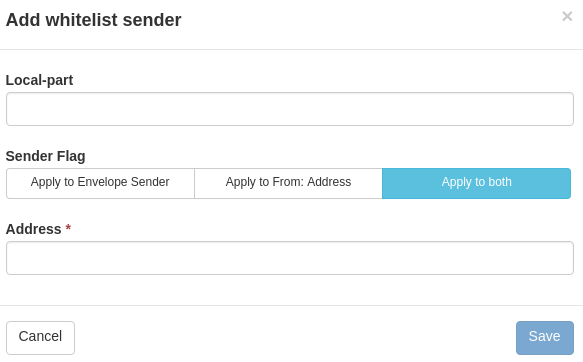
To add entries one by one, you will need to use the Add whitelist sender button. This will open a new pop-up window, where you will need to:
- Select the Sender Flag. This can be:
- Envelope Sender
- From Address
- Both
- Add the address / wildcard that you want to whitelist.
- Click Save
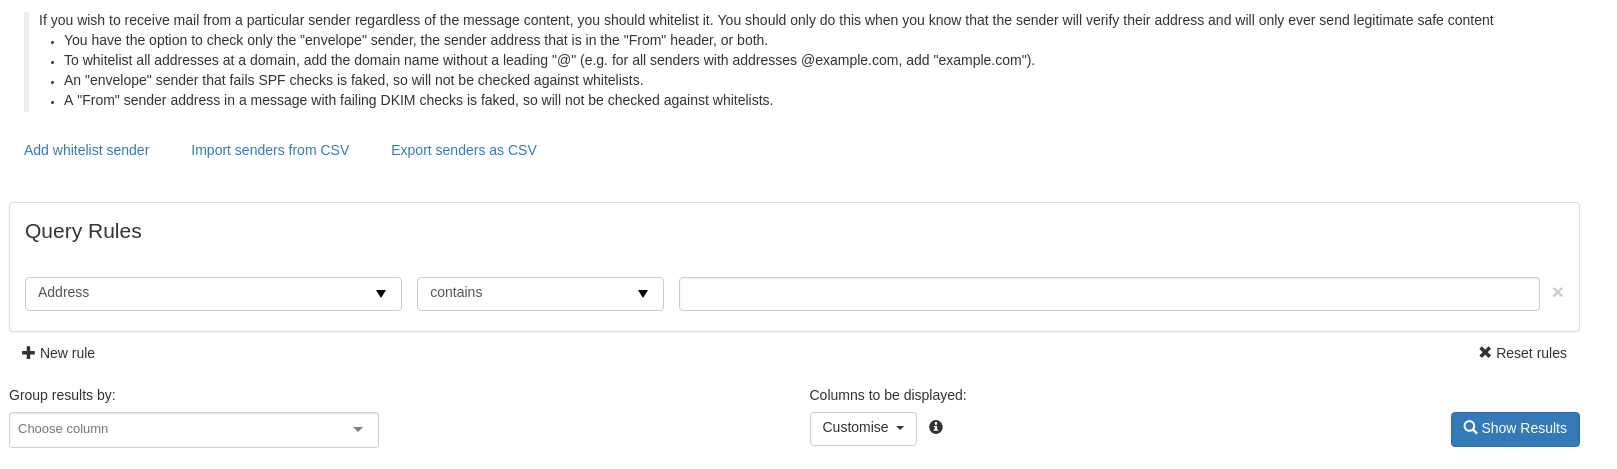
To view the Existing entries, once you get to the Sender Whitelist Section, you need to click on the Show Results button.

If no search criteria is used, then all entries will be displayed. If you want to search for a specific address, you will first need to populate the Query Rules. By default, only the Address field is selected. You can adjust this by using the drop down list, or add new Rules by using the New Rule button.

Sender Blacklist (email user)
The email user level sender blacklist allows the recipient to add specific senders or domains to the blacklist.
A wildcard is available here.
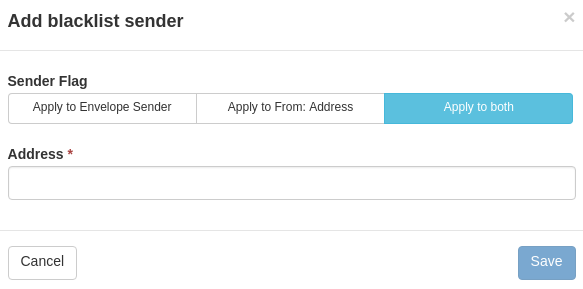
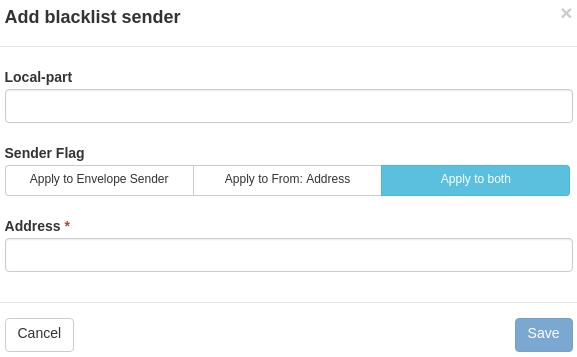
To add entries one by one, you will need to use the Add blacklist sender button. This will open a new pop-up window, where you will need to:
- Select the Sender Flag. This can be:
- Envelope Sender
- From Address
- Both
- Add the address/wildcard that you want to whitelist.
- Click Save
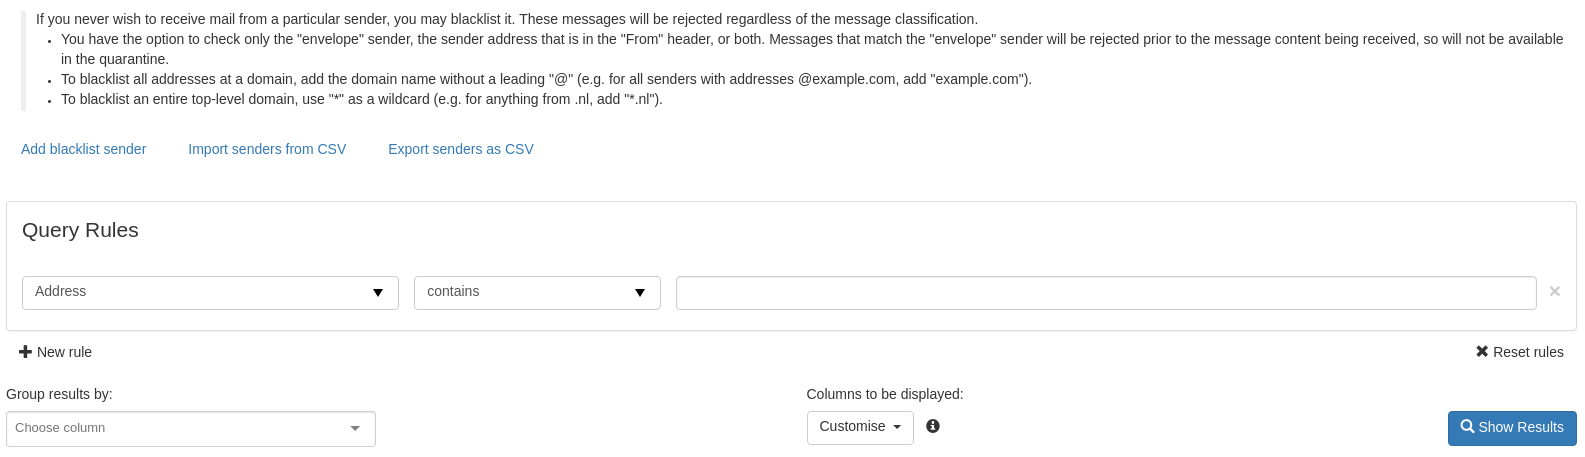
To view the Existing entries, once you get to the Sender Blacklist Section, you need to click on the Show Results button.
If no search criteria are used, then all entries will be displayed. If you want to search for a specific address, you will first need to populate the Query Rules. By default, only the Address field is selected. You can adjust this by using the drop-down list or add new Rules by using the New Rule button.

User profile
In this section, you can edit the user’s profile and enable options such as :
Features preview
Enabling this option gives the user the ability to be able to view and use new features that are being developed. Please note, that as these are previews, they are subject to change at any time. Once enabled, the new options will be shown in the interface with "(preview)" in the icon.

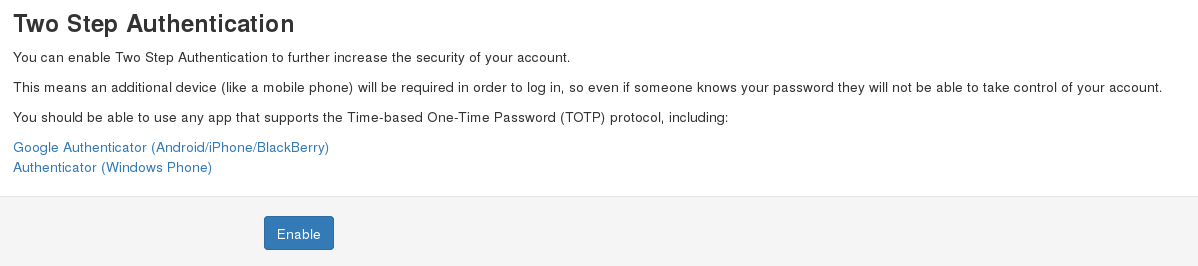
Two Step Authentication
To increase the security of your account. This means an additional device (like a mobile phone) will be required in order to log in, so even if someone knows your password they will not be able to take control of your account without your device as well.
For Two Step Authentication, you should be able to use any app that supports the Time-based One-Time Password (TOTP) protocol, including:
- Google Authenticator (Android/iPhone/BlackBerry)
- Authenticator (Windows Phone 7)
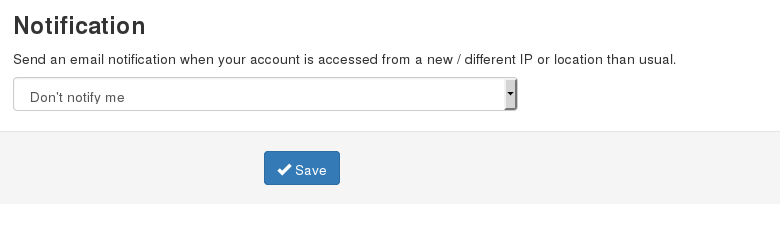
Notification
The Notification option when enabled sends an email notification when the account is accessed from a new/different IP.
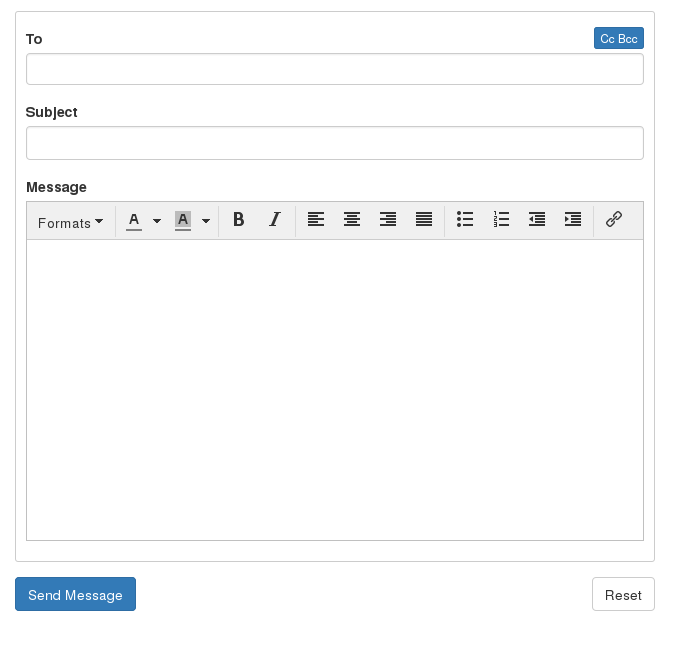
Compose email
The following page allows you to compose an email directly from the interface. This isn’t intended to be a full email client, but you are able to set and change the To, CC, and BCC addresses, use rich formatting, and insert links into messages.
Domain User Level
Domain settings
In this section, postmasters can set the maximum bounces, enable/disable logging for invalid recipients, and set accessible/inaccessible logging days for your domains which are using the default settings.
You can also activate Direct delivery for email and domain aliases which ensures that when aliasing is in use, the emails will be delivered to the alias address, instead of the original one. This applies to both Email and Domain aliasing. Note that the Log Search will still show the message for the original address.
The Rejected Local-part characters are the characters that are allowed in the local part (before the @ part ) of the email address. As regex is used, anything inside the “[ ]” is not allowed. Thus removing a character here will allow that character in the local part.
You can “Edit Rejected Characters” by setting up a list of regular expressions. If a local part of the recipient matches any of the regular expressions, then the recipient will be rejected.
Advanced Domain settings
The advanced domain settings page allows you to configure further options per domain.
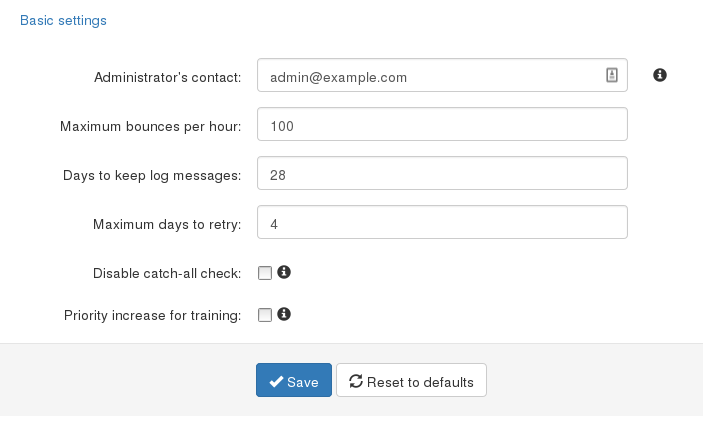
Administrator contact
Here the domain admin contact is set. This is used for password retrieval for domain users.
Maximum bounces per hour
Configurable bounce messages (NDR) per hour per domain.
Days to keep log messages
Logging days to be set. Note the larger this is set the more disk space is used.
Maximum days to retry
The number of days that a message should be retried in the delivery queue. By default, this is 4 days but can be adjusted if needed. Please note, that this only affects new messages when changing and any existing messages that are queued will remain at the original value.
Disable catch-all check
This option can be used to disable the catch-all check when it fails to work properly with servers that have a non-standard behaviour (like Microsoft Exchange 2013)
Priority increase for training
If you are 100% sure that users at this domain are correctly training messages, then you can increase the weight of the training process for this domain. Raising this weight will increase the importance of user training as a general filtering factor, thus altering the filtering results. Some automated secondary review processes for messages will be postponed when using this option, meaning that training will have an impact more quickly. Make this change with caution.
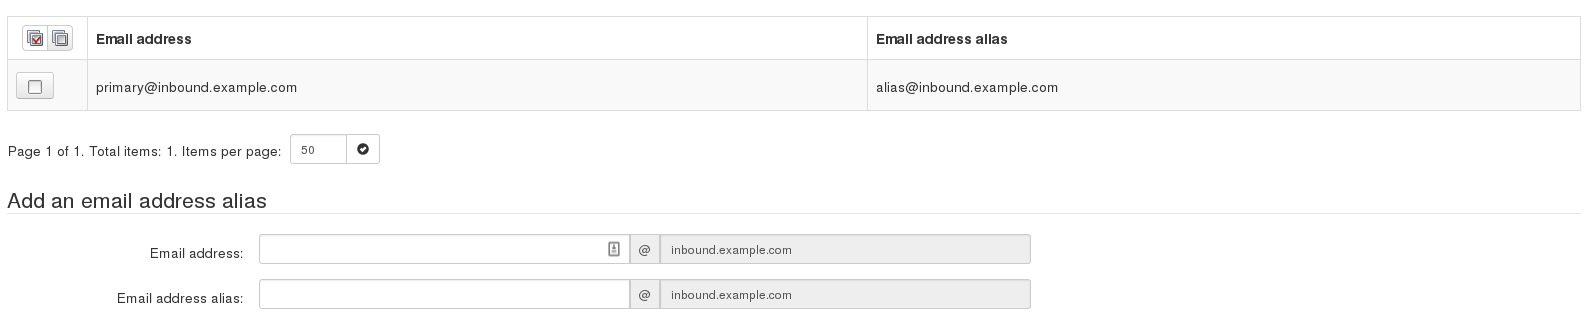
Email address aliases
Here you can add aliases for your email addresses
Simply fill in the two fields, “Email Address” and “Email Address Alias”, and click “Add”.
Now the email address alias will appear in the list. By selecting it (tick the checkbox) you can remove the alias.
Email address aliasing rewrites the recipient at SMTP level to the primary address. The "To:" is not changed.
Domain Aliases
If you have multiple domains, you can make use of the domain aliasing option. Domain aliases can be added to your main domain directly in the web interface. Any email sent to the domain alias will be delivered to the same user on the main domain.
Messages delivered to the alias domain will be re-written at SMTP level to the main domain, so the local email part MUST exist on the main domain.
Alias domains don’t have separate access to the control panel. Since all SMTP traffic to the domain alias is rewritten to the main domain, any changes/lookups on the main domain will simply include the alias domain traffic as if it was sent directly to the main domain. If you are searching for a specific email sent to a domain alias using the log search, the recipient will, therefore, show as user@maindomain.

Email and address alias is also supported. For example, if the domain example.org is an alias for the primary domain example.com, and example.com has an email alias example_alias@ for the primary mailbox example@, then:
example_alias@example.com is an alias for example@example.com
example@example.org is an alias for example@example.com
example_alias@example.org is an alias for example@example.com
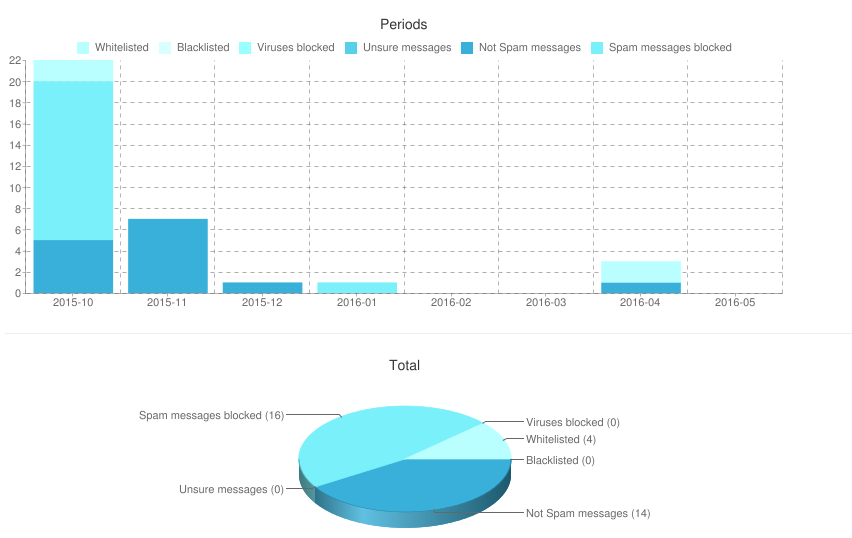
Domain statistics
Here you can view the statistics for a given time-frame (Hours, Days, Weeks, Months, Years) of your incoming email traffic.
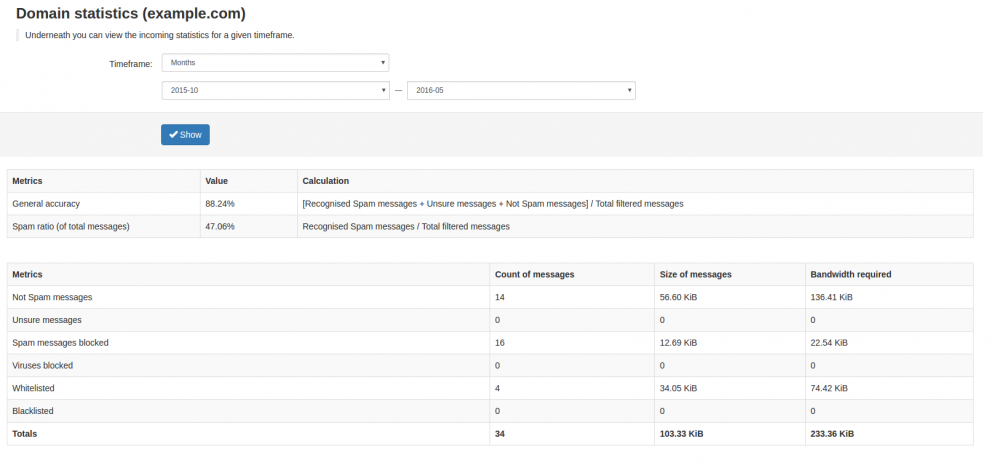
Statistics are displayed for :
- General accuracy
- Spam ratio (of total messages)
- Not Spam messages
- Unsure messages
- Spam messages blocked
- Viruses blocked
- Whitelisted
- Blacklisted
Filter Settings
With the Filter settings function, you can control the activation of the quarantine system as well as other options.
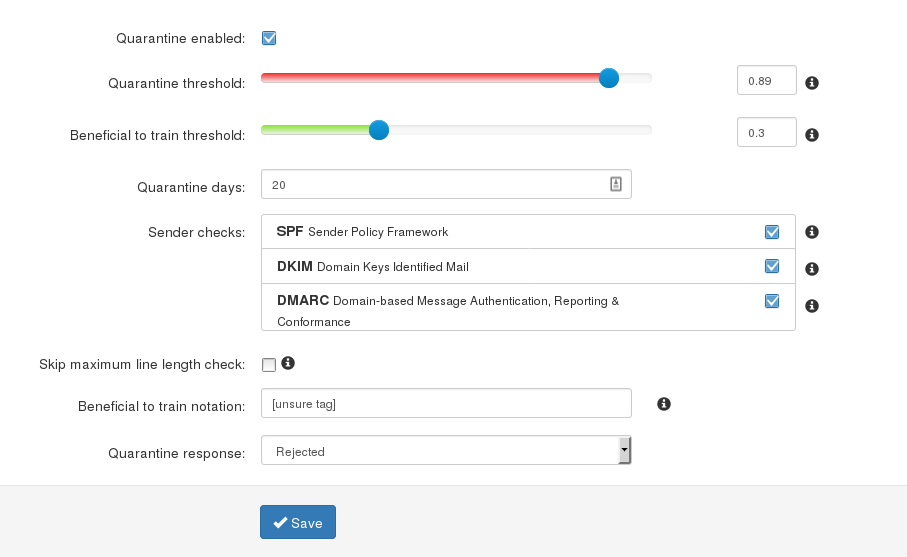
Quarantine enabled
If you disable the quarantine system, emails detected as spam will not be kept in the quarantine system but will be delivered to your destination email server. Under “Spam Notation” you can mark these messages with a specific subject notation. Note that we do NOT return a 5xx reject message for messages classified as spam if the quarantine has been disabled, we do return a 5xx reject message for messages classified as spam if the quarantine is enabled. Every email gets a special header added “X-Recommended-Action: accept” or “X-Recommended-Action: reject”. You can filter the message based on this header if quarantine is disabled.
Threshold
The Quarantine Threshold slider (in red) indicates what score you have set for spam messages. The higher the score, the higher the threshold our systems detect and flag the message as spam. We recommend setting this level to 0.90 to avoid any mail delivery problems.
The "Beneficial to train" Threshold slider (in green) indicates at what threshold our systems classify the message as unsure, the higher the number set here, the higher threshold our systems have to reach before we class it as unsure. The default here should be 0.3. This option is primarily used when pro-active training is needed.
When a message gets blocked using this method, you can see the combined score in the headers of the email. For example:
X-BrandedHostname-Evidence: Combined (0.96)
Quarantine days
Here you can set the number of days for how long you wish to store the spam emails in the Spam Quarantine. This applies globally to all the domains using the default settings. (Super Administrators only)
Sender Checks
Here you can enable/Disable SPF/DMARC/DKIM related checks per domain. Note in doing this all messages for this domain will have these checks disabled.
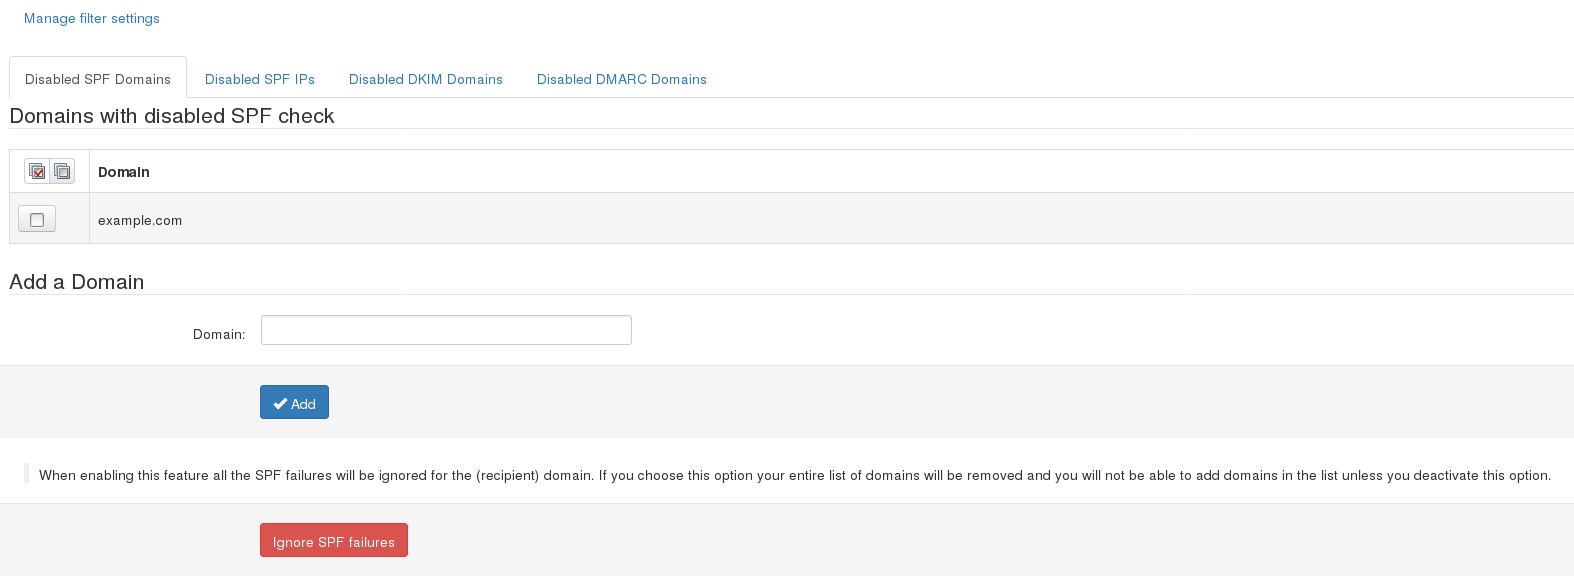
We strongly recommend that all these are enabled. If you wish to skip specific sender domains or IP's from these checks we would recommend that you use the following option:
Manage list of domains and IP addresses with disabled SPF, DKIM, and DMARC checks
Skip Maximum Line Length
This means that emails for all the domains using the default settings will not be subject the RFC line length checks.
Settings
On this page, you can set the administrator’s contact email for the domain.
This address is predominately used for ARF (Abuse Report Feedback) reports.

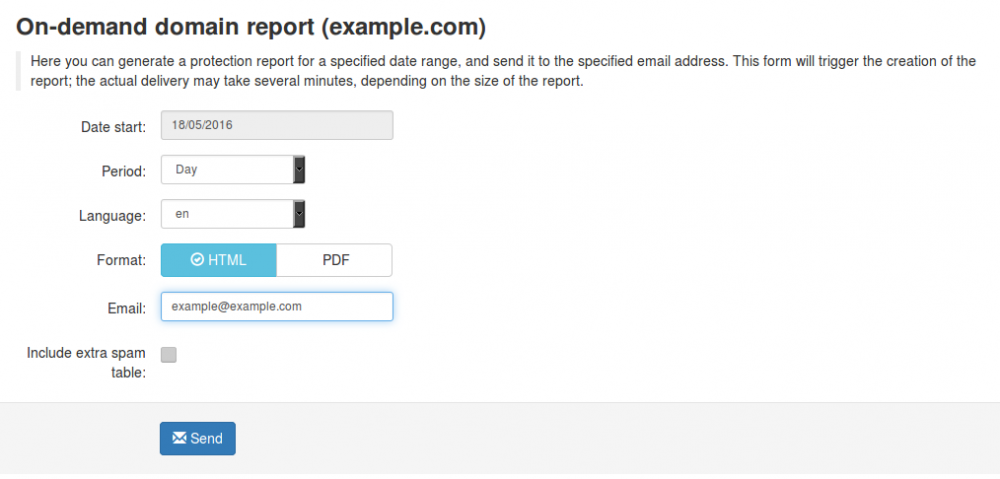
On-demand Protection report
Using this feature you can generate a Protection Domain Report for a specified date range, and send it to a specified email address. The format of the report can be either HTML or PDF format.
The “Include extra spam table” is only used in the PDF reports, and this adds a table of messages that were rejected but not quarantined.
Periodic domain report
A daily or weekly report can be generated for your domain (or for specific recipients at a domain) and is delivered via email. Multiple recipients can be separated by a comma. A report can also be generated on-demand from the API/web interface.
The report can be sent as a PDF attachment or as inline HTML. The PDF report outlines a summary of the spam and viruses that the filtering service has protected the domain (or address) from receiving and also includes information about the total volume of mail processed for the said domain.
The PDF report also includes a detailed table (for auditing purposes) of messages that were rejected but not quarantined; this table is configured by default but may be disabled via the API/web interface – it will be very large for some domains. A similar table is also included with the messages that were quarantined, including links to release each message directly.
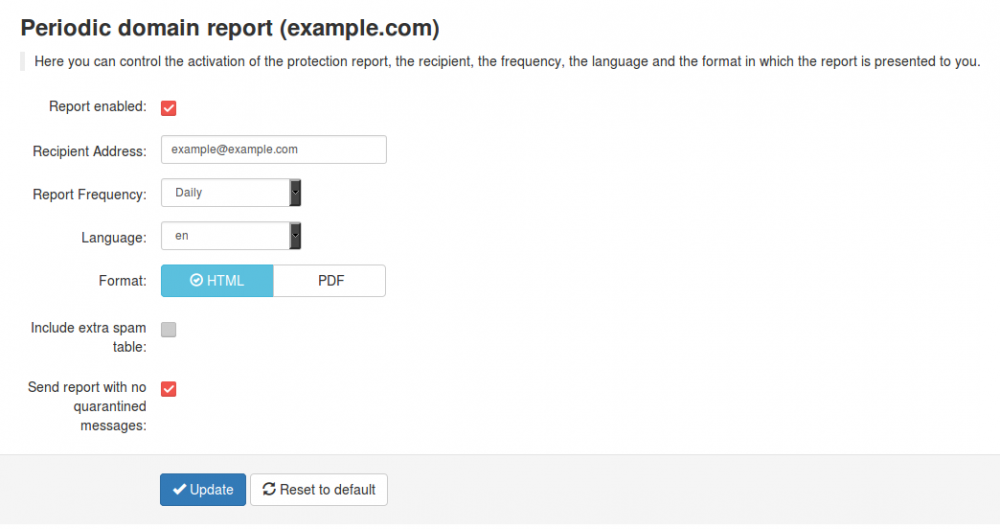
Settings defined here will mean that users on this domain will also take these values
Periodic User Report
As domain user, with this option, you can enable Periodic Protection Reports based on users. You can add users, either individually or via the .csv upload function for multiple users (multiple uploads is only available for domain users). Only ASCII characters are supported for the local part.

The report will contain an overview of the quarantined messages for a specific user, including links to release each message directly.
The option “Automatically activate for all recipient” will automatically add users to the user report list, and then once added, send them a daily or weekly report on the spam received. It will also send the end users a welcome email, in the beginning, to let users know their personal quarantine has been activated. If users would like to log in and see and adjust settings, they can do it using the login link in the email.

If your domain has “Catch-All” enabled, then this option will not be available for use. For Exchange versions that do not have recipient verification enabled, please see here for instructions on how to enable this.
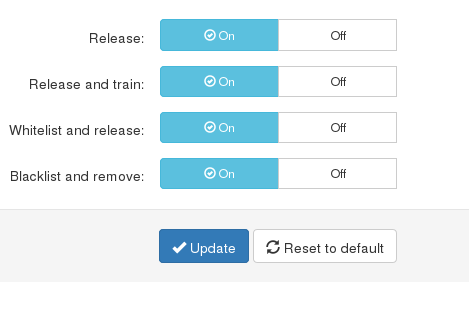
Domain report actions
This option allows you to restrict specific actions that are available via the user and domain reports. By default, all options are enabled, however, if you wish to disable the training or releasing options you can do this here. This will affect all users on the domain.
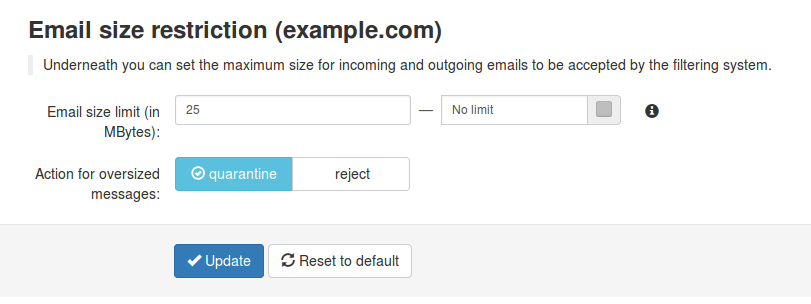
Email restrictions
By default, the system applies no limits to the email size and uses the size set by the destination mail server. You can, however, set the maximum size for incoming and outgoing emails to be accepted by the filtering system. If the message exceeds the limit, it can either Rejected and stored in the Spam Quarantine or it can be Rejected with 5xx code(and not stored in Spam Quarantine) depending on how you set this up.
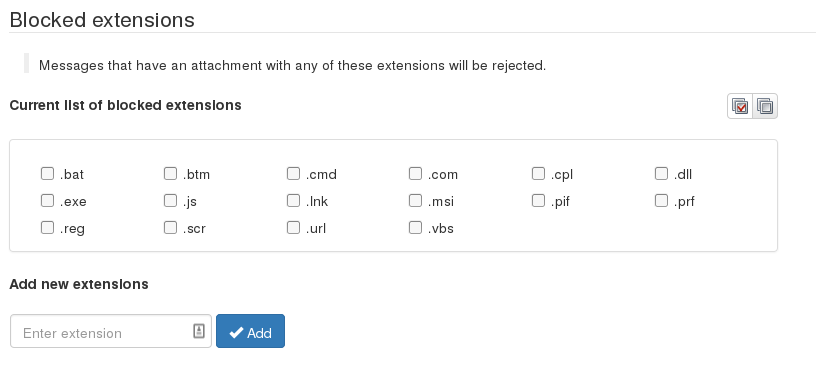
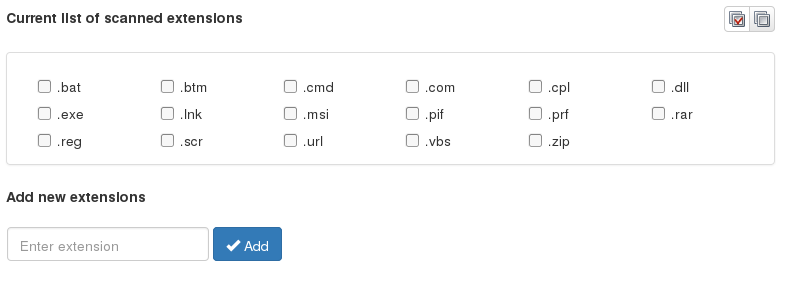
Attachment restrictions
You can specify which emails should be blocked based on the extension of the files attached. There is a list of some extensions added by default but you can add whatever extension type you want. If a file extension will be blocked the email message which contained the attachment will be quarantined.
Restricted Options:
here you are able to enable/disable messages that are likely to be dangerous. for example, compressed archives that have executable within a zip file, compressed archives that are password protected, and attachments that are classified as PUA (This can be attachments that have runtime packers for example or PDF's that contain Javascript)

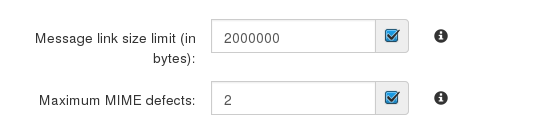
Additional restrictions:
The additional restrictions options allow to configure how many mime parts are allowed for a message, and the “message link size limit”. The message link size limit refers to the “scanned link extensions” below. As malware will often be of a small size, we would recommend setting this to around 2MB maximum.
Scanned link extensions:
By default when a message is sent with a link inside the email, the content of this link is not downloaded. Here you can configure this. For example, you can add “.zip” and “.rar” to this list, and if a message is sent with “http://example.com/mybadfile.zip”, then the “mybadfile.zip” will be downloaded and scanned. We recommend to never add things like “.php”, “.html” etc to this list.
Sender Whitelist
This page allows you to configure whitelisted senders for either the whole domain or specific users.
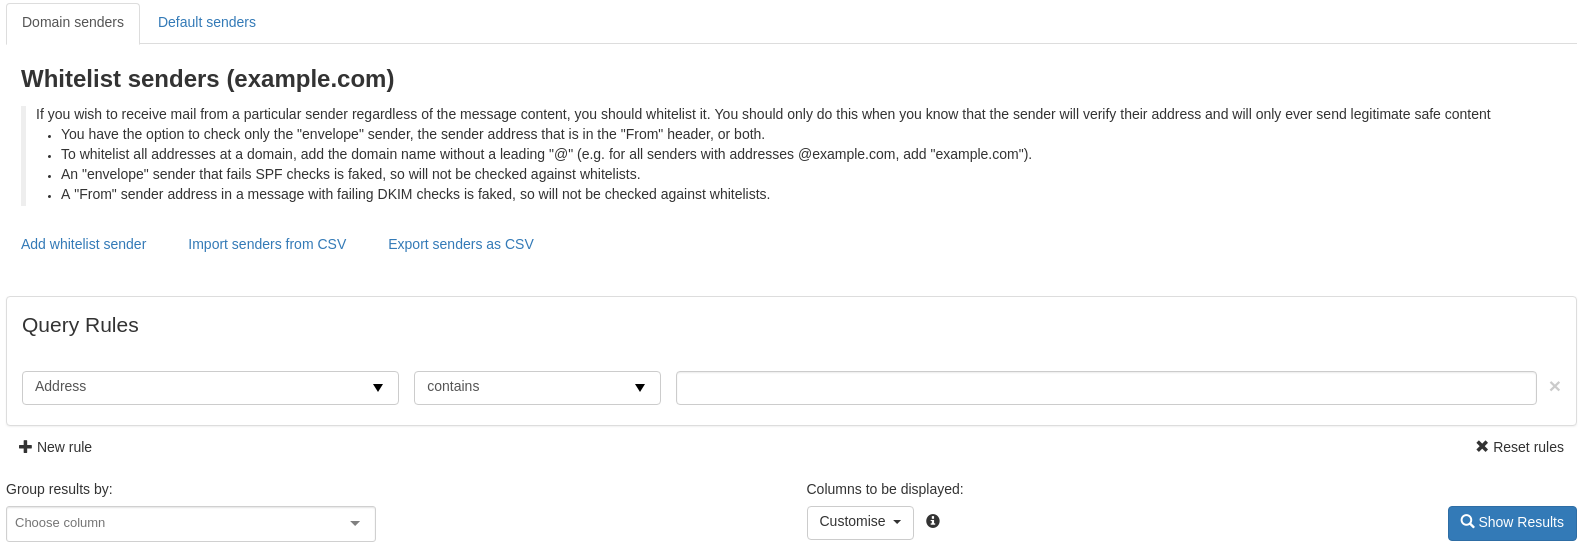
For domain whitelisting simply add the domain (or email address) of the sender you wish to whitelist in the "Sender" part, and leave the "Local-Part" empty.
If you want to whitelist a sender only for one recipient, add the local part only. (the part before the @)
Wild-cards are possible here when whitelisting senders.
- *.example.com - Will whitelist all sub-domains of example.com
- *.TLD - Will whitelist the entire TLD
To view the Existing entries, once you get to the Sender Whitelist Section, you need to click on the Show Results button.
If no search criteria is used, then all entries will be displayed. If you want to search for a specific address, you will first need to populate the Query Rules. By default, only the Address field is selected. You can adjust this by using the drop down list, or add new Rules by using the New Rule button.
In the Default Senders tab, you will be able to see the addresses that have been whitelisted by default for the entire cluster. You can choose to use those addresses or not, by simply selecting between Yes and No for the Use Default Values.

Recipient whitelist
The recipient whitelist is used when no filtering of the recipient is needed. Any recipient added here will have all messages delivered without any filtering.
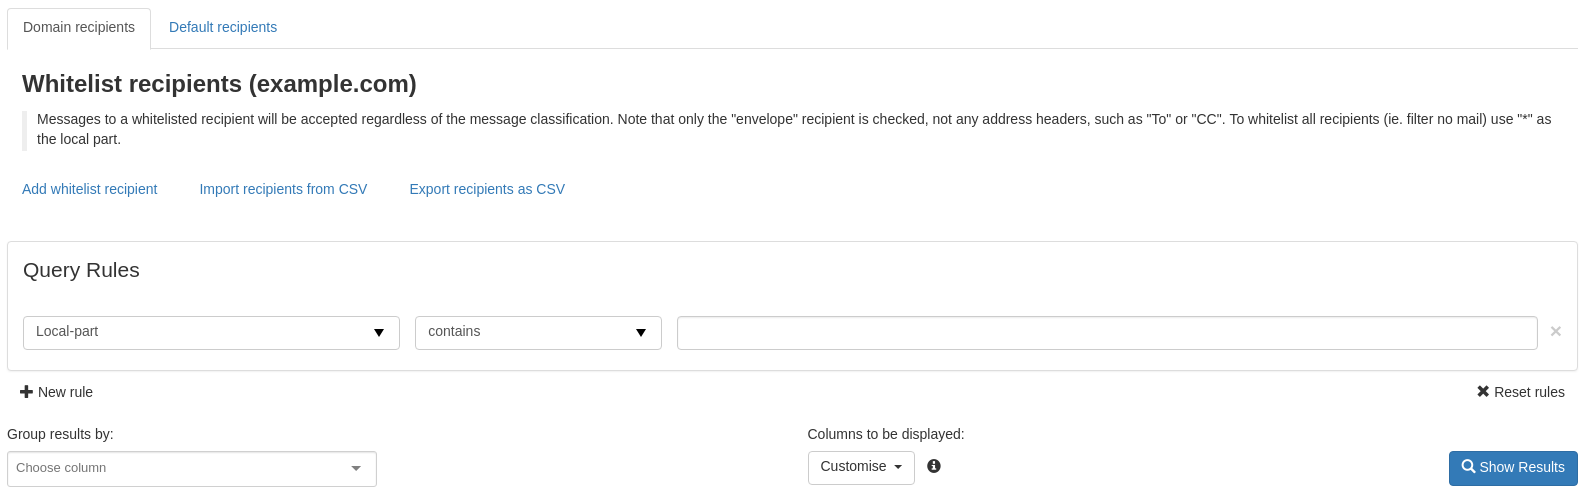
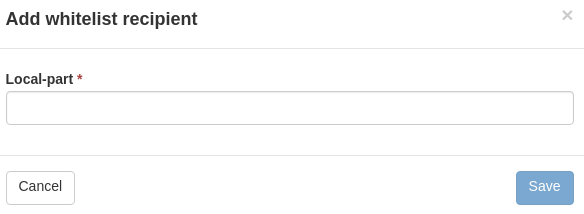
To add a recipient to the list, you need to use the Add whitelist recipient button and in the new pop-up screen, you only need to add the local part (the part before the @).
To view the Existing entries, once you get to the Recipient Whitelist Section, you need to click on the Show Results button. In the Domain recipients tab, only the recipients added for this domain will be returned. In the Default tab, you will see addresses that have been whitelisted by default for the entire cluster. By default, the "abuse@" and "postmaster@" addresses are added.
You can choose to use those addresses or not, by simply selecting between Yes and No for the Use Default Values.
Sender blacklist
To allow the domain administrator or email user to remain in control over the filtering, it’s possible to blacklist a sender.
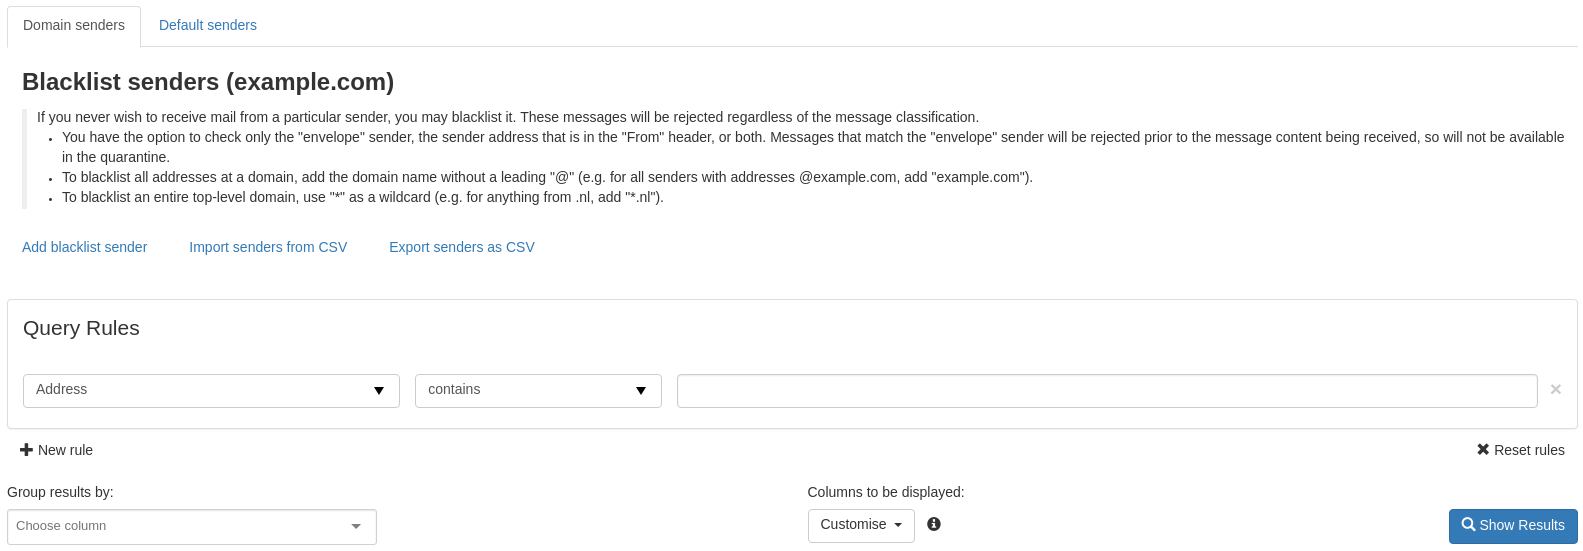
The check works based on the MAIL FROM (envelope-sender) provided by the sender at SMTP level and the From address that is visible to recipients or both. The MAIL FROM might be different from the From: address.
- Messages from blacklisted MAIL FROM (Envelope-senders) addresses are rejected at SMTP level and are not quarantined.
- Messages from blacklisted "FROM:" addresses (if different) are quarantined.
For domain blacklisting simply add the domain (or email address) of the sender you wish to blacklist in the "Sender" part, and leave the "Local-Part" empty.
If you want to blacklist a sender only for one recipient, add the local part only. (the part before the @)
Wild-cards are possible here when blacklisting senders.
- *.example.com - Will blacklist all sub-domains of example.com
- *.TLD - Will blacklist the entire TLD
To view the Existing entries, once you get to the Sender Blacklist Section, you need to click on the Show Results button.
If no search criteria are used, then all entries will be displayed. If you want to search for a specific address, you will first need to populate the Query Rules. By default, only the Address field is selected. You can adjust this by using the drop-down list or add new Rules by using the New Rule button.
In the Default Senders tab, you will be able to see the addresses that have been blacklisted by default for the entire cluster. You can choose to use those addresses or not, by simply selecting between Yes and No for the Use Default Values.
Recipient blacklist
The recipient blacklist is used when the mentioned recipient should not receive any email. Any recipient added here will have all messages blocked.
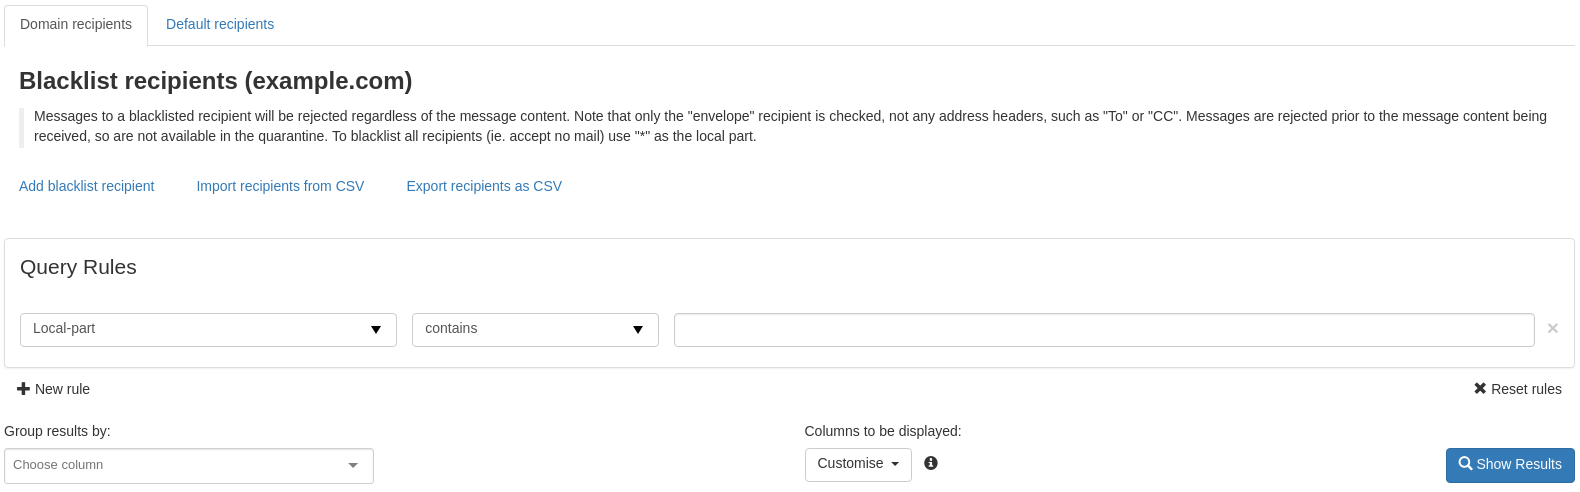
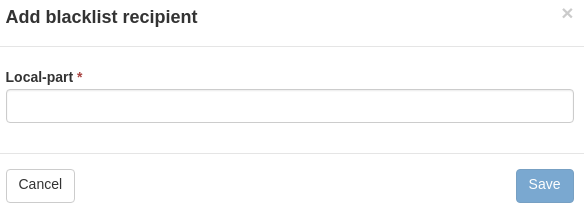
To add a recipient to the list, you need to use the Add blacklist recipient button and in the new pop-up screen, you only need to add the local part (the part before the @).
To view the Existing entries, once you get to the Recipient Blacklist Section, you need to click on the Show Results button. In the Domain recipients tab, only the recipients added for this domain will be returned. In the Default tab, you will see addresses that have been blacklisted by default for the entire cluster.
You can choose to use those addresses or not, by simply selecting between Yes and No for the Use Default Values.
Manage email users
With this function, you can manage email users. These users can log into the Control Panel with their email address to see their own quarantine and manage their specific email settings.
Please ensure that the domain you are creating the email for already exists on the server, and when setting the password, the password must contain lower case letters, at least one upper case letter or one digit, no spaces, and must be 6-25 characters in length.
Only ASCII characters are supported for the local part.
You may also upload a Comma Separated Values (CSV) file. Each line in the file must contain at least four columns, the username, the domain, the password and the status.
The password must contain lower case letters, at least one upper case letter or one digit, no spaces, and must be 6-25 characters in length.
As a higher level user, you also have the ability to “Login as user”.
If you select an Email user in ‘Manage Email Users’ page and press the drop-down black arrow you have several options such as:
- Edit Email User
- Delete Email User
- Log in as the Email User
- Require 2FA

With "Require 2FA", a Domain user can require specific users, or all users, to use 2FA. If a user didn’t previously have this enabled, they will be prompted to set it up on their first login after it’s requested.